A proper glue-up is less about making a mess with adhesive and more about getting consistent coverage, keeping the layup organized and getting the stack into the mold within the adhesive’s usable assembly window.
Use these as a shot list, not as the finished photography.
I want the real article to feel this clear while still unmistakably being your shop. Don't try to recreate every frame exactly; steal the useful ideas — angle, distance, lighting and what detail the image explains.
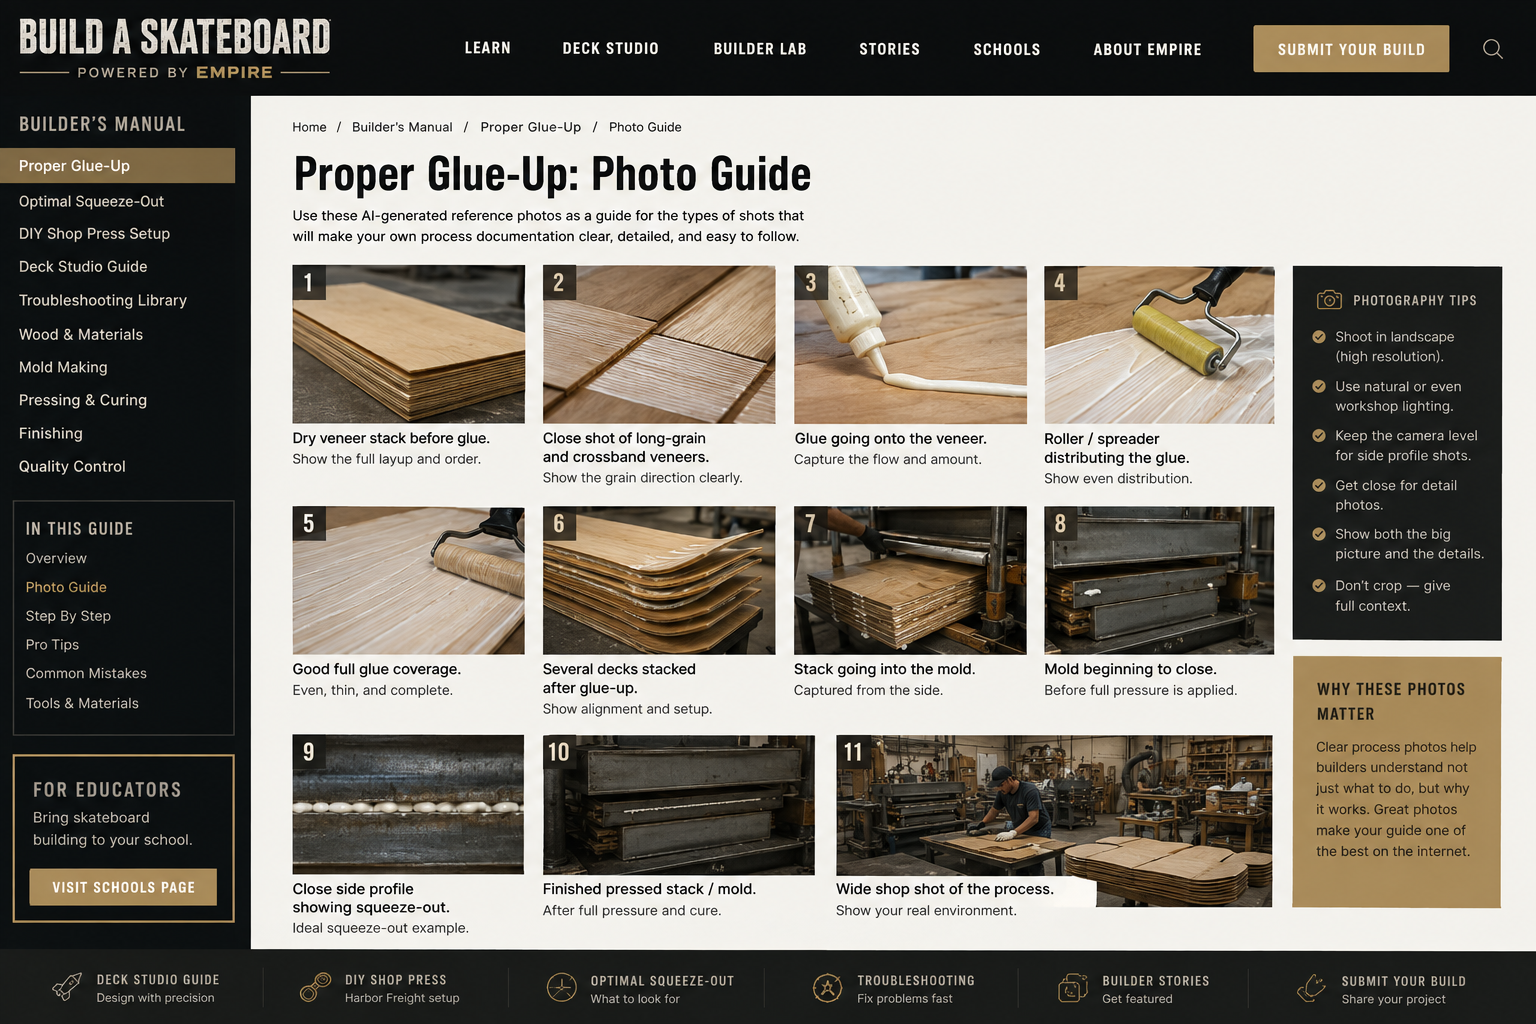
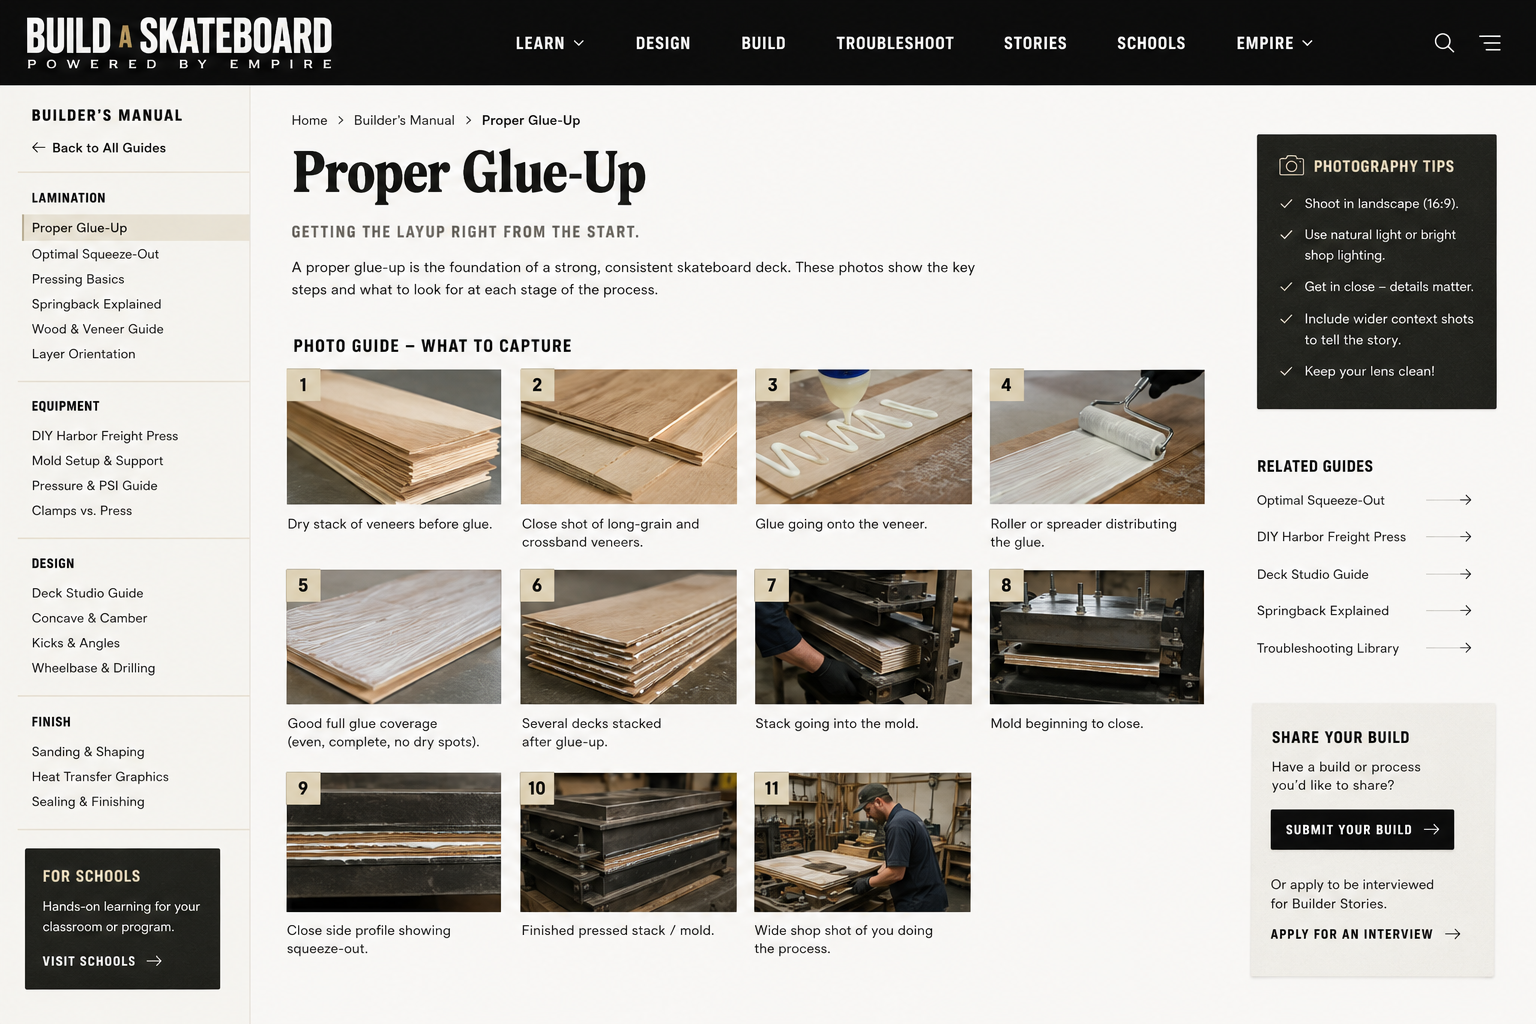
Photos I would actually take in your shop
- 01. Full dry veneer stack before any glue.
- 02. Macro shot showing long-grain vs. crossband grain direction.
- 03. Glue bead landing on a clean veneer face.
- 04. Roller mid-pass with half the sheet coated.
- 05. Finished glue coverage shot with no dry islands.
- 06. Glued stack from a low 3/4 angle showing all layers.
- 07. Hands loading the stack into the mold.
- 08. Mold just beginning to close before full pressure.
- 09. Dead-level side profile of ideal squeeze-out.
- 10. Mold/stack fully under pressure.
- 11. Wide environmental shot of you working at the station.
- 12. One imperfect example worth teaching from.
Start with a repeatable layup
Know the order of your long-grain and crossband veneers before you start spreading glue. Stack the dry layup in sequence and keep it oriented the same way every time. The goal is to remove decisions once the clock starts.
Coverage matters more than puddles
You want complete, even adhesive coverage across each glue line. Dry islands are the problem. Huge puddles are not a substitute for consistent spreading and can create unnecessary mess and variability.
Work with a clock, not a guess
Your usable assembly time starts before the final sheet is glued. If you are pressing multiple decks, develop a repeatable rhythm for spreading, stacking and loading the mold so the earliest glue lines are not sitting indefinitely.
Load clean and centered
Before pressure comes on, confirm that the veneer stack is seated where you expect it in the mold. An off-center stack or shifted ply can create problems that look like pressure or mold issues later.
What to document in your own build
Take wide photos of the setup and close-ups of the details. Record the veneer, adhesive, timing, mold and anything you changed. Good notes turn one successful deck into a process you can repeat.